Bridal Glam Room Checklist: Home and Venue Setups
Elevate Your Wedding Day with the Perfect Bridal Glam Room Setup
Your wedding day is the celebration of a lifetime, and as the bride, you deserve a calm, radiant space to step into your “I do” glow. The secret to flawless photos, relaxed prep, and a seamless timeline starts with a dedicated bridal glam room. Whether you’re getting ready at home or in a venue suite, thoughtfully planning your bridal glam room checklist takes the stress out of wedding day makeup vanity worries and ensures your beauty team can work their magic. From pro-level lighting to portable makeup stations for stylists, and seating solutions to power supply, every detail matters. This comprehensive guide walks you through both home and venue setups, with expert tips to help you create a space where memories, photos, and beauty all shine as brilliantly as you do.
Your Bridal Needs: What Goes Into the Ultimate Glam Room?
Organizing the ultimate bridal glam room requires more than just a mirror and a makeup bag. After months of planning, your wedding day beauty prep should be as enjoyable as the ceremony itself—smooth, social, and absolutely stunning in every selfie and candid photo. Let’s break down the essential needs for your bridal glam room:
- Dedicated Space: A separate area, even within a suite, prevents clutter and keeps beauty supplies organized away from food, guests, or last-minute outfit adjustments. This is key for both home and venue setups.
- Professional Lighting: Proper bridal makeup vanities ensure that makeup artists get a true-to-life reflection and your look reads perfectly in every setting—from golden hour to evening reception lighting.
- Portable Makeup Stations for Stylists: If your glam squad needs to move between sites or work in tight spaces, portability and efficiency in setup are crucial.
- Secure Seating: Comfortable, adjustable seating allows you and your bridal party to relax while hair and makeup teams get to work.
- A Functional Layout: Space to spread out, plug in, and prep without crowding or chaos ensures a pleasant environment for everyone involved.
- Timeline Planning: Coordinating hair, makeup, and photo schedules keeps everything running smoothly. Having checklists for each stage sets expectations and reduces big-day anxiety.
Remember, the goal of a bridal glam room is more than just beauty—it’s about confidence, organization, and creating a joyful space where memories are made before the spotlight even hits.
Lighting Requirements for Bridal Makeup: Pro Tips for Flawless Photos
Lighting is the single most important element in any bridal glam room setup—and the difference between a stunning look and makeup mishaps that only show up in your photos. Wedding day makeup vanity lighting needs to mimic daylight, reduce shadows, and enhance every skin tone, ensuring your finished look is radiant from aisle to first dance.
Why Lighting Matters:
- Color Accuracy: True-to-life lighting lets artists match foundation shades and blend complexion products for a natural finish, avoiding the dreaded “white cast” or orangey undertones that can appear in camera flashes.
- Minimized Shadows: Good illumination reduces awkward lines and patchiness, especially under the eyes or along the jawline—so every angle is your best angle.
- Photographer Ready: The right lighting setup supports your pro photographer’s edits and means you’ll love every image, from candid laughs to formal portraits.
Glam Room Lighting Checklist:
- Natural Light is King: Whenever possible, choose a space near large windows to take advantage of flattering, even daylight. North-facing windows tend to give the best, most consistent light for makeup application.
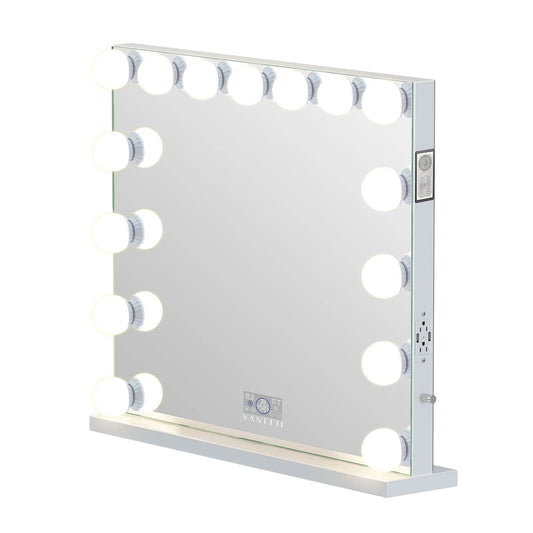
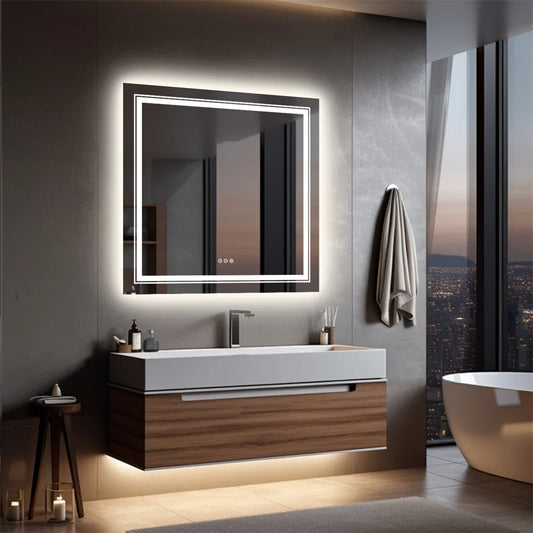
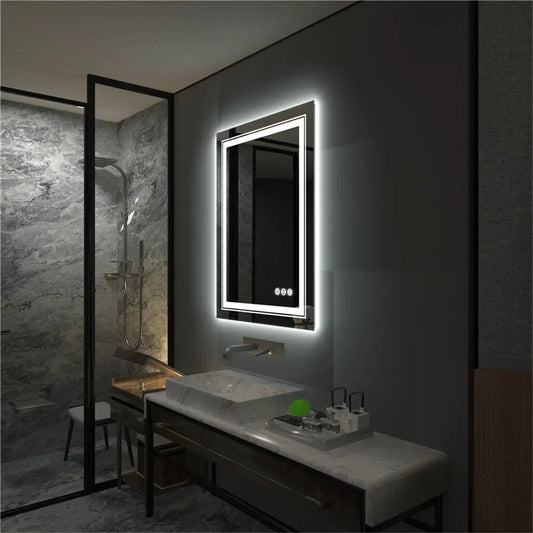
- Professional LED Vanity Lights: If you’re getting ready before sunrise or in a venue with dim lighting, supplement with a professional LED lighted vanity desk. Look for adjustable settings, like daylight and warm/cool options, to match the wedding’s environment and the bride’s specific needs. Many makeup artists prefer ring lights or vanities with built-in LED panels because they create an even glow with minimal shadow.
- No Overhead Lights Alone: Harsh overhead fixtures can accentuate texture, create dark shadows, and change color perception. Always complement ceiling lights with face-level illumination.
- Test Shots: A simple selfie at the vanity during your trial run gives feedback on how makeup will appear on camera. Before the big day, let your stylist or photographer check the lighting and suggest changes.
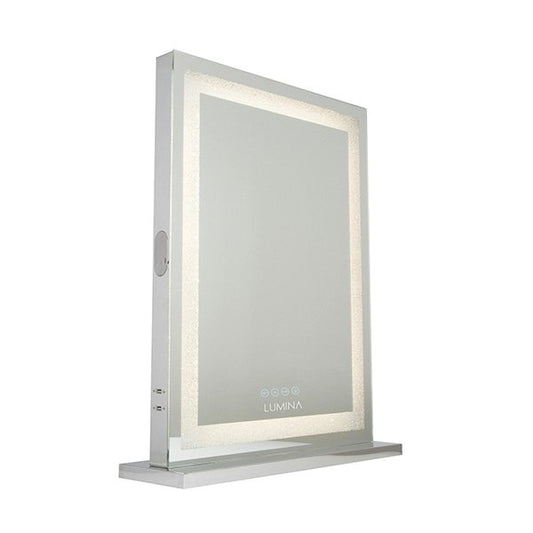
- Portable Options for Stylists: If your makeup team is traveling or needs setup flexibility, portable vanity mirrors with built-in lighting allow for consistency no matter where you’re getting ready. For adaptable, travel-friendly solutions, check out the Crystal Vanity Mirror, which brings pro lighting anywhere.
Expert Tip: If you plan to get ready with your entire bridal party, make sure there’s enough illuminated vanity space for everyone to avoid long waits and makeup artist bottlenecks. Multiple smaller vanities with built-in lights can be a game changer.
Portable Makeup Stations for Stylists: Mobility, Storage, and Smart Setups
On-location weddings and home preps often mean your beauty team needs to transform any space into a pro-grade bridal glam room quickly. Enter the era of the portable makeup station for stylists—products designed with mobility, storage, and work surface needs in mind. Whether in a hotel suite, backyard, or historic venue, portability ensures your stylists can deliver flawless results anywhere.
What to Look For in a Portable Makeup Station:
- Lightweight Construction: The ideal station is durable yet easy for stylists to load in and out—especially valuable if stairs or elevators are involved.
- All-In-One Organization: Storage drawers, tool compartments, and clear surfaces help keep brushes, palettes, and skincare hygienically separated and instantly accessible.
- Adjustable Mirrors with Built-In Lighting: Integrated lighting isn’t just a luxury—it’s a necessity for on-the-go glam. Choose stations with variable brightness and color temperature to adapt to any room.
- Easy-to-Clean Surfaces: Glitter, powders, and setting sprays can leave a mess; non-porous materials keep the prep area tidy throughout the day.
- Expandable Work Area: Drop-leaf surfaces, pull-out trays, or modular add-ons can double work-space for hair and makeup teams working side by side.
Setups for Every Scenario:
- At Home: Convert a dining room table into a beauty station with a feature-packed, glass-top vanity (see this adjustable LED glass-top option here). The key is maximizing both workspace and lighting while keeping things organized for those all-day events.
- Venue Suites: If your suite lacks prep space, portable vanities let teams set up by a window or in a corner without waiting for hotel furniture to be rearranged. Pre-assembled mobile stations allow for quick setup and breakdown, essential for venues with tight timelines.
- Bridal Party Prep: Don’t forget your bridesmaids and family! Multi-station vanities or several mid-sized portable solutions mean no one’s left scrambling for a mirror when timing is tight.
Expert Tip: Assign a bridesmaid or planner to coordinate the setup and teardown of portable stations. Keeping setup efficient lets your stylists make the most of their talent instead of managing logistics.
Seating and Power: Comfort, Accessibility, and Energy for the Entire Prep Team
The glamour is in the details—stylists can’t deliver magic without comfortable seating and reliable power for all their tools. Overlook these essentials, and you risk sore backs, tired feet, or worst of all—an untimely flat iron or curling wand cutoff.
Seating Solutions for Bridal Glam Rooms:
- Adjustable Artist Stools: Look for stools that raise and lower easily to match both artist and bride’s height. Backless stools allow stylists to move around freely, but if comfort is a priority, padded options with lumbar support let you enjoy extended beauty sessions.
- Bridal Throne or Special Chair: Even if your style is modern and minimalist, designating a special “bride’s chair” adds a personal touch and makes the entire experience feel luxurious and celebratory.
- Guest and Bridal Party Seating: Provide a mix of chairs, ottomans, and chaises for the bridal party to relax, snack, or snap behind-the-scenes photos without crowding the main glam area.
- Non-Slip Surfaces: No slipping on silk robes here—make sure seats have secure cushions and positioning to keep the prep area safe and comfortable through the hustle of the morning.
Powering Up:
- Extension Cords and Power Strips: Most hotel or venue suites have only a few accessible outlets—and you’ll need several on hand for hair tools, steamers, additional lamps, and phone chargers. Choose surge-protected extension cords for extra safety.
- USB Charging Stations: Modern glam rooms often double as charging hubs for phones, ring lights, or Bluetooth speakers. Stations with built-in USB ports can make all the difference to your timeline and team’s energy levels.
- Cord Management: Gaffer tape and cord organizers keep the space safe and prevent accidental unplugging during those critical last-minute touch-ups.
Expert Tip: Test all electronic tools and lighting during your trial beauty session. This ensures that blow dryers, curling irons, and lighted vanity mirrors can run at full strength throughout the morning, with backup solutions in case anything fails.
Layout and Timeline Checklist: Organize for a Calm, Joyful Morning
The most stunning bridal glam rooms aren’t just well-lit—they’re well organized. A functional layout and preparedness checklist can mean the difference between a relaxing morning and a frenzied rush to the altar. Use this as your master plan to ensure both home and venue setups run seamlessly, supporting your artists while making cherished moments with your bridal crew.
Step-by-Step Bridal Glam Room Layout:
- Pick Your Glam Zone: Choose a room or suite with plenty of natural light, enough outlets, and some privacy. Avoid spaces with heavy traffic (like kitchens) or where other vendors might need to set up.
- Assign Makeup and Hair Stations: Set up separate areas for hairstyling and makeup to reduce crowding and double the workflow. Position vanities near light sources and away from air vents that could disrupt styling.
- Arrange Seating: Place the bride’s chair closest to the largest, brightest vanity mirror (such as the LED glass-top vanity desk with ample storage). Allow stylists space on both sides for easy movement and access to supplies.
- Optimize Storage: Keep hair and makeup products sorted in trays, bins, or shallow drawers. Use labels or color-coding for each bridal party member’s products if possible.
- Create a Snack and Chill Zone: A small table stocked with water, snacks, and straws (to protect lipstick) helps keep everyone energized and comfortable. This area is essential for longer prep sessions.
- Bring Personal Touches: Add in aromatherapy diffusers, soft music, or a curated playlist, framed photos, or a custom sign to set a celebratory atmosphere unique to your style.
Timeline for the Big Day:
-
6-9 Months Out:
- Book makeup artists and hair stylists who specialize in wedding day makeup vanity setups. Ask about lighting, vanities, and portable stations they provide or recommend.
- Consider trial sessions to assess lighting and space needs.
-
3-6 Months Out:
- Create a beauty timeline with input from each stylist. Include estimated prep times for the bride, bridesmaids, and family.
- Shop for glam room essentials—vanities, lighting, stools, organizers, and extension cords. Compare features and quality, ensuring your choices can be used post-wedding at home.
-
4-6 Weeks Out:
- Finalize the guest list for the glam room. Make space plans and confirm seating/snack needs.
- Have your makeup and hair trial in the actual room or a similarly lit space. Take photos in different lighting to test your chosen setup.
-
1-2 Weeks Out:
- Create a setup map and share with your planner, bridal party, and beauty team. Assign set-up/tear-down helpers for portable makeup stations for stylists.
- Pack an emergency “glam room kit” with extra lighting, extension cords, makeup wipes, backup lashes, snacks, and first aid supplies.
-
The Night Before:
- Double check all products are packed, charged, and ready. Lay out your wedding day makeup vanity and storage bins with labels.
-
Wedding Morning:
- Arrive early, set up all stations, start music, and enjoy—embrace each joyful moment!
Printable Bridal Glam Room Checklist:
- Lighted vanity mirror (with adjustable settings)
- Portable makeup stations for stylists
- Adjustable stools/seating for bride and bridal party
- Extension cords, surge protectors, and USB charging station
- Organizers for makeup, hair tools, and accessories
- Snack/beverage station with straws and napkins
- Ambient music or speaker
- Emergency beauty and first aid supplies
- Order of services and prep timeline
Your Dream Glam Room, Step by Step
The magic of your big day begins the second you step into your bridal glam room. Whether you’re creating a serene haven at home or orchestrating a professional-grade setup in a bustling venue suite, your attention to the details—lighting, portable makeup stations for stylists, comfortable seating, and an organized timeline—ensures confidence, relaxation, and beauty that shines in every photo.
To recap, prioritize professional lighting for every wedding day makeup vanity, invest in high-quality yet mobile makeup stations suited to your prep team, and ensure everyone involved has comfortable seating and ample power sources. A clear layout and a wedding prep timeline transform the hours before your walk down the aisle into some of the most cherished moments, shared side by side with your favorite people.
For brides seeking vanities with integrated lighting and storage, perfect for both home and venue setups, see this versatile glass-top option or explore portable pro lighting solutions here.
With this thorough bridal glam room checklist, you can step into your wedding day glowing, relaxed, and surrounded by comfort and style. Here’s to a beautiful beginning and a perfectly prepped you!