There’s nothing more satisfying than looking into a sparkling-clean LED vanity mirror—especially when you know you’ve taken the right steps to keep it shining like new. Whether you’re perfecting your makeup application, shaping your brows, or creating content for the ‘gram, a flawless, streak-free mirror does more than reflect your face: it enhances your whole beauty experience. If you’ve been wondering about clean vanity mirror techniques, best practices for LED mirror maintenance, and the safest way to handle your favorite makeup mirror, you’re in the right place.
This comprehensive guide for www.luminapro.co will walk you through everything you need to achieve that glowy reflection—from picking the right cleaning products, to preventing annoying scratches, to knowing when those bulbs finally need replacing. We’ll touch on troubleshooting issues and give you simple, gentle solutions. And don’t worry: you’ll learn how to spot when your LED vanity mirror needs a little extra attention, so it stays as flawless as your beauty routine. Let’s dive in!
Safe Cleaning Products
The number one rule for how to clean makeup mirror surfaces—especially when they incorporate LED technology—is to be exceptionally gentle, both with your cleaning tools and your cleaning agents. The goal is to get a clean vanity mirror without causing unnecessary wear, dullness, or streaks in the process.
Why Harsh Chemicals Are a No-Go
LED vanity mirrors—like the ones at LuminaPro—often use high-quality reflective glass and sensitive touch controls. Ammonia-based cleaners, overly acidic products, or abrasive wipes can cloud the surface, degrade anti-fog coatings, or even compromise LED strips. If you’ve ever noticed your mirror starting to look hazy or feel sticky, aggressive products are often to blame. Instead, choose cleaning agents formulated for glass and electronics.
The Best Cleaning Solution for LED Mirrors
- Distilled Water: Avoids mineral deposits and is safe on electronics. Lightly mist a microfiber cloth rather than spraying the mirror directly to protect sensitive bulbs and wiring.
- Gentle Glass Cleaner: If you prefer, dilute a drop of mild dish soap in a cup of water, or choose a streak-free, ammonia-free glass cleaner. Look for formulations labeled “safe for LED displays” or “for electronics.”
- Isopropyl Alcohol (Optional): For sticky makeup residues or stubborn fingerprints, a mix of 70% isopropyl alcohol with distilled water (50:50) is effective and quick-drying. Always test first on a corner to ensure it doesn’t leave streaks or damage finishes.
Choosing the Right Cloth or Pad
Paper towels can leave lint trails and may scratch delicate surfaces, especially when pressed hard against glass. Microfiber cloths, polishing pads for eyeglasses, or super-soft cotton towels are your best bet for getting a clean vanity mirror with no risk of scratching. Make sure your cloth is washed and free from loose threads or fabric softener residue, which can leave smears.
Safe Steps Checklist
- Turn off or unplug your vanity mirror before cleaning, especially if you’ll be near power buttons or LED controls.
- Lightly mist your microfiber cloth with your chosen cleaning solution. Never spray directly onto the glass or frame.
- Wipe the mirror surface gently, using straight strokes (up and down, then side to side), rather than circular motions that push dirt around.
- Buff gently with a dry, clean section of the cloth to eliminate any streaks.
- Repeat with a dampened cloth for touch controls or frame edges, avoiding seams where moisture could seep in.
What to Avoid
- Window sprays with ammonia or vinegar
- Abrasive sponges or paper towels
- Excessive moisture around LED bulbs, controls, or seams
- Bleach, hydrogen peroxide, or heavy-duty multi-surface cleaners
Preventing Scratches
Even a single scratch can dull the seamless look of your LED vanity mirror, catching light in all the wrong ways. Prevention is key—not just to maintain a clean vanity mirror, but to support the longevity of your reflective surface and the embedded LED lights. Here’s how you can keep your glass scratch-free, while ensuring unblemished LED mirror maintenance.
Handle With Clean Hands
It seems simple enough, but oils, grit, and makeup residue from your fingers can act like sandpaper on glass. Always wash your hands before adjusting your mirror, cleaning it, or using touch sensor controls. If you see fingerprints or marks, spot-treat with a dampened microfiber pad rather than rubbing them in further.
Choose the Right Tools—Every Time
- Use only microfiber, cotton, or lens cleaning cloths. No napkins, no tissues, and certainly no scratchy household rags.
- For hard-to-reach corners or edges, a soft-bristled makeup brush can gently dust away eyeshadow fallout or powder buildup without damaging the mirror’s surface.
- Store your cleaning cloths separately—don’t wash them with jeans, towels, or fabrics that shed lint or may leave rough particles behind.
Watch Out For Jewelry and Accessories
Earrings, rings, and bracelets can scrape against the glass as you lean in for a precise cat eye or brow shaping. Create a “jewelry-off” rule when finishing up your skincare or makeup to help avoid accidental scratches.
Proper Storage and Everyday Habits
- Keep cotton swabs, makeup brushes, and tweezers safely stowed away rather than resting on your mirror ledge.
- If you use sticky note reminders on your mirror, remove them gently and avoid ballpoint pens that may leave trails if pressed too hard.
- Never place or lean products directly on the mirror’s surface, especially compacts or palettes that may have grit or powder on their undersides.
Cleaning Frequency
Daily dusting with a separate, clean, dry microfiber cloth helps keep particles at bay. For deeper cleaning sessions, once or twice a week is plenty—unless you’re working with intense makeup pigments or styling sprays that cause more frequent residue. This minimizes the need for aggressive scrubbing, which is a major cause of scratches when performing how to clean makeup mirror routines.
When to Replace Bulbs
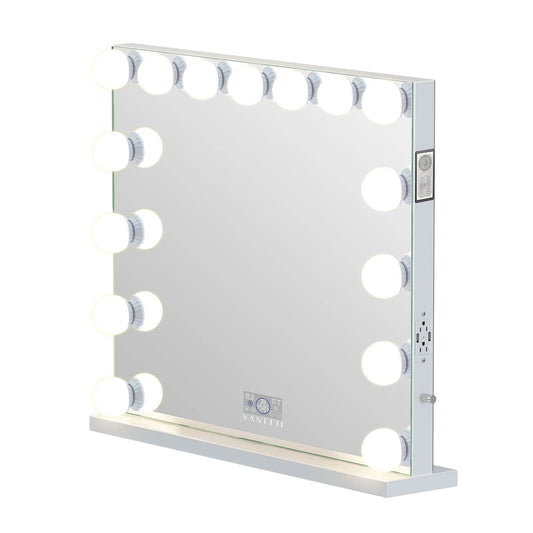
Modern LED vanity mirrors, especially those with built-in customizable lighting like the smart RGB Bluetooth mirror at LuminaPro, feature long-lasting bulbs—but they aren’t immune to wear over time. Proper LED mirror maintenance means recognizing when your lights need an upgrade and replacing them with care to preserve the rest of your mirror’s integrity.
Signs Your LED Bulbs Need Replacing
- Noticeable Dimming: If your once-bright mirror now casts a softer, more yellow (or blue-) toned glow, the bulbs may be fading.
- Flickering or Uneven Light: Intermittent blinking, incomplete LED ring illumination, or one side appearing dimmer could mean a connection is loose—or a bulb is on its way out.
- Nonresponsive Controls: If your mirror no longer brightens or shifts color on cue, but power is still running, lights may be failing internally.
- Burnt Out Strips or Spots: Dead patches, dark spots, or segments that don’t light up when the rest of the mirror is on.
Finding Replacement Bulbs
Most modern LED vanity mirrors come equipped with integrated LED strips or bulbs that last tens of thousands of hours—often for years before even a slight dimming is noticeable. However, some designs, especially larger makeup mirrors or those with exposed globe-style bulbs, are designed for user replacement. Consult your product’s manual or visit your manufacturer’s website for the correct bulb type and model. For LuminaPro models, support resources and compatible accessories can be found by reviewing their product support FAQ or reaching out directly.
Safe Bulb Replacement Steps
- Power Off Always! Unplug your vanity mirror before attempting any bulb work to prevent electrical shock.
- Wait For Cool Down: LEDs stay cooler than traditional bulbs, but give the fixture a few minutes to cool completely before touching.
- Handle With Care: Use clean hands or cotton gloves to remove the old bulb. Avoid twisting glass bulbs forcefully—follow the instructions for your specific mirror. For integrated LED strips, it’s best to contact customer support.
- Install Carefully: Make sure bulbs are securely placed and properly aligned. For color-changing or smart bulbs, test all light modes before returning to your regular beauty routine.
After Replacing Bulbs
Wipe the area around the bulbs gently with a dry microfiber cloth to remove prints or dust. Check for any flickering or connectivity issues after you first power the mirror back on. If you notice continued problems or premature dimming, contact the product support team for troubleshooting or warranty service.
Cleaning Steps
No matter what type of LED makeup mirror you own, these cleaning steps work to keep it clear and pristine, supporting the best possible light diffusion and reflection. Incorporating these steps into your regular beauty routine makes LED mirror maintenance effortless and helps you avoid the headaches of a dirty or streaky surface.
- Unplug your mirror or turn off the power at the switch.
- Using a lint-free microfiber or eyeglass cloth, gently brush away any loose dust or powder. For hard-to-reach places, use a clean, soft-bristle makeup brush.
- If deeper cleaning is needed, spray your chosen cleaning solution onto your microfiber cloth (never onto the mirror). Use long, gentle strokes, switching cloth sections as needed to avoid spreading dirt.
- Pay special attention to corners, touch controls, and the base. Wipe only the surface—avoid pressing into seams, as moisture can cause internal damage.
- Buff with a second dry microfiber cloth to remove any haze, leaving the surface crystal clear.
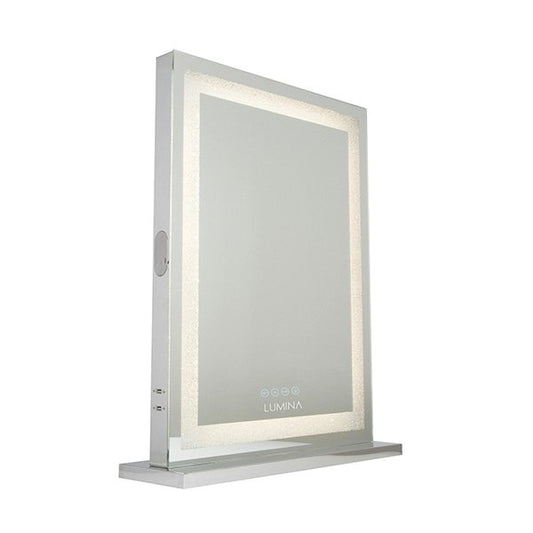
For Bluetooth-enabled or color-changing mirrors—like the feature-packed LuminaPro RGB smart mirror—dust around any ports or control panels with a dry brush, and avoid moisture near speakers or charging docks.
Dos and Don'ts
- Do unplug your mirror or switch it off before cleaning.
- Do use pure distilled water, a gentle electronic-safe cleaner, and lint-free microfiber cloths.
- Do spot-treat makeup, hairspray, or oil stains promptly with a dampened section of your cloth.
- Do clean in gentle, straight lines—no circles or excessive pressure.
- Do check for streaks by angling your head side-to-side under LED lights.
- Do clean the base and frame periodically to keep dust and makeup from collecting.
- Don’t use window spray, vinegar, ammonia, or general-purpose household cleaners on your LED makeup mirror.
- Don’t scrub with paper towels, tissues, or abrasive sponges.
- Don’t spray cleaning solution directly onto your mirror—always apply it to the cloth.
- Don’t submerge any part of your LED vanity mirror in water or use soak-heavy wipes.
- Don’t attempt to disassemble your mirror or LED housing for cleaning unless directed by the manufacturer.
Consistency is everything. A few gentle daily habits keep your LED mirror maintenance routine stress-free and effective for years to come. If you’re searching for easy-to-clean, durable LED mirrors, check out some top-rated options here.
Troubleshooting
Even with the best practices for how to clean a makeup mirror and performing regular LED mirror maintenance, troubleshooting might be needed from time to time. Below are issues you might encounter—and tips for fixing them quickly, so your mirror stays as functional as it is beautiful.
Streaky Finish After Cleaning
- Problem: Persistent streaks or cloudy spots after wiping.
- Solution: Use less solution next time—a barely-damp, ultra-clean cloth works best. Buff again with a dry microfiber. Avoid glass cleaners with alcohol or surfactants that may leave films behind.
Persistent Fog or Haze
- Problem: Foggy patches that don’t wipe away, especially near touch controls.
- Solution: Wipe with a cloth dampened with distilled water, focusing on a single area at a time. Allow to air dry completely. If residue remains, a mild electronics or screen-safe cleaner may help.
Unresponsive Touch Controls or Lights
- Problem: Mirror won’t light up, or responds poorly to touch.
- Solution: Wipe the touch panel with a dry, clean microfiber. Ensure the mirror is completely dry, and inspect power sources or adapters. If issues persist after replacing bulbs and checking connections, contact product support for further guidance.
Dusty Edges and Accumulated Debris
- Problem: Dust collects at the edge of the glass or under LED strips.
- Solution: Use a soft makeup brush or compressed air to clear debris. Avoid using sharp objects or inserting anything under the strips.
Surface Scratches
- Problem: Small, shallow surface scratches that dull reflection.
- Solution: While most scratches can’t be erased, using glass-polishing kits may help lessen their appearance. For deep scratches or cracks, contact your manufacturer for repair options or to discuss replacement parts.
Intermittent Bulb Flicker or Dimming
- Problem: LEDs occasionally flicker or lose brightness.
- Solution: Double-check connections and ensure replacement bulbs (if applicable) are the exact right fit. Always use bulbs recommended or provided by your mirror’s maker for guaranteed compatibility and safety.
Keep Your LED Vanity Mirror Crystal Clear
Cleanliness, care, and consistency are the secret to a flawless reflection and long-lasting performance with your LED vanity mirror. Armed with this guide, you’ll confidently choose safe cleaning products, master the art of preventing scratches, and know exactly when it’s time to refresh your bulbs. These best practices elevate your routine—not just for looks, but also to protect your investment, ensuring your mirror continues to support every beauty moment.
If you’re eager for a clean vanity mirror that rivals any professional studio, use distilled water, gentle glass cleaner, and a plush microfiber every time. Say goodbye to harsh chemicals and careless scrubbing—your mirror (and your morning) deserve better! Check out LuminaPro’s advanced LED options for effortless maintenance and customizable lighting features that last.
In summary: Safe tools and gentle habits keep your LED mirror both stunning and strong. Preventing scratches, cleaning the right way, and replacing bulbs as needed lets your vanity mirror work its magic for years to come. Here’s to every reflection being just as brilliant as you are!


