There are many ways to add lights to your vanity, from light kits to LED light strips to rechargeable light bars. Mirrors with elegant lighting can give us a luxurious look, allowing makeup enthusiasts to utilize their creative juices to the best of their abilities.
Adding lights to vanity mirrors has been a popular choice for generations. It gives our face the illumination it deserves and improves our makeup practices.
When the lighting is poor, it affects the way we see color and can impact the quality of our makeup application. However, professionally lit mirrors can be pricey, so let’s compare DIY lit mirrors with professional-grade ones.
Check out our collection of LED Lighted Vanity mirrors
Why Is Good Lighting Important for Makeup Application?

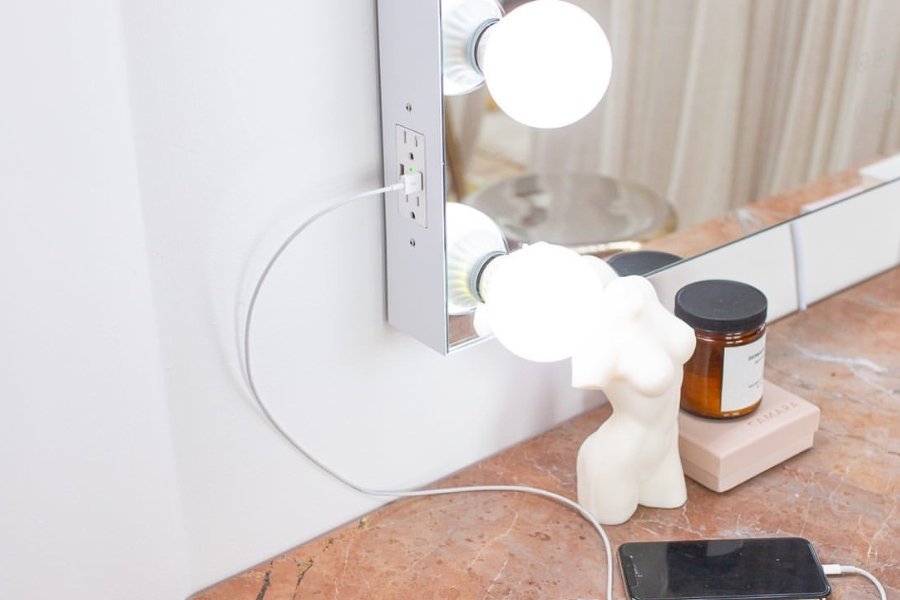
Photo by New Africa on Adobe Stock
Lighting can greatly impact the way humans perceive color. If a room is too dark or too bright, we will see color differently than in natural sunlight.
Natural daylight is full-spectrum, which means it contains all the colors of the rainbow, even the colors we cannot see.
The Color Rendering Index, or CRI scale, ranges from 0 to 100 and shows us how precise a light source is at displaying color when compared to natural sunlight.
The higher the CRI, the better the light source. If we choose a light that doesn’t render good color, then a lipstick or foundation we thought looked good could look harsh or uneven in natural light.
No one wants to spend money on luxury cosmetics only to fail at application due to the wrong lighting.
Choosing the right lighting for your makeup can make a huge difference in your appearance.
Which Light Bulb Is Best for Makeup Lighting?

Photo by Roman on Adobe Stock
LED bulbs are the best choice for makeup lighting because they provide accurate color rendering, daylight simulation, dimmability, energy efficiency, and cool operation.
When choosing to light your vanity mirror, it’s important to consider brightness, heat, color, and energy efficiency.
Incandescent and tungsten bulbs can radiate an orange glow, affecting how we see the makeup we’re applying to our skin.
LED bulbs are by far the best option for makeup application. While they were invented in 1962, they weren’t widely utilized until 2008. However, LEDs are ideal because they:
- Use less energy
- Don’t give off heat
- Are dimmable
- Have a good CRI
- Imitate natural sunlight
Being able to dim the light bulbs on your vanity mirror can help you see what your makeup application and color will look like in different lighting.
In the real world, not everywhere has consistent lighting. So it’s helpful to have bulbs that are capable of being dimmed, yet have the ability to imitate natural light.
How to Add Lights to a Mirror — DIY Vanity Mirror Lights - Complete Guide

Photo by Masson on Adobe Stock
There are several options to consider when adding your own lights to a vanity mirror.
These include LED light kits, LED light strips, vanity strips, sconces, and cordless battery-powered mirror lights.
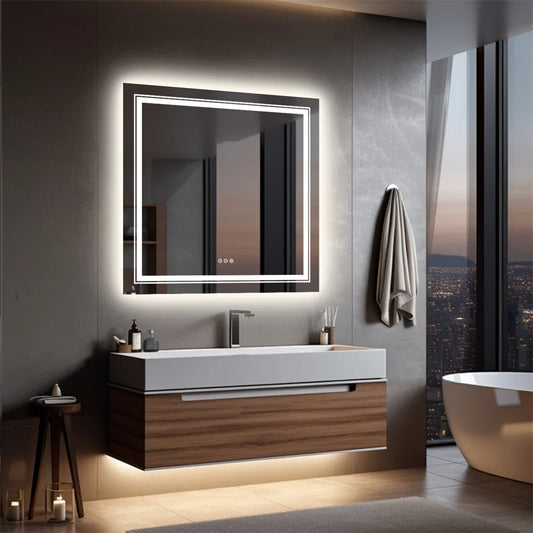
Before we jump onto the guide, here is how this mirror looks like when built professionally that we sell too :)

Let’s go over a few ways to add lights to your vanity mirror.
Method 1: Add a Light Kit to Your Mirror

What You’ll Need
- Frameless mirror
- Tape measure
- Electrical tape
- Light kit
- Ruler
- A clean cloth

Step 1. Wipe down your mirror with a clean cloth, clearing it of all dust and smudges so that your lights will adhere better.

Step 2. Unbox and untie the string lights from your light kit.

Step 3. Place the light bulbs around your mirror where you think you want them to go.

Step 4. Measure the placement of each bulb, making sure they are equal distance from each other.

Step 5. Use a tape measure or ruler to measure the distance between each light bulb and make sure they line up evenly on the opposite side of the mirror.
The distance between each bulb will depend on the length of your light kit and the size of your mirror. Placing bulbs about 7½ inches apart on each side and 9 inches apart on the top of your mirror should look good for a 24” x 30” mirror.

Step 6. Once you’ve measured and made certain you like where the light bulbs are placed, take the adhesive off the back of each bulb and place them on your mirror’s surface.

Step 7. Tape the wires between each light bulb to the back of the mirror by pulling them to the back and adhering them with electrical tape. This will hide those messy wires a bit more.

Step 8. Plug in your light kit and enjoy your new mirror with lights!
Again If you want to avoid all this, you can buy a professionally tough and durable mirror from us!

Method 2: Add LED Light Strips to Your Mirror

What You’ll Need
- Flexible LED light strip
- Power adapter cord
- L-shaped, two-pin LED strip connectors
- Mirror
- Scissors
- Glue
- LED light remote and adapter

Step 1. Lay down the flexible LED strips around the edges of your mirror.

Step 2. With your fingers, run the first LED light strip tight along the side of your mirror.

Step 3. Once you reach the corner of the mirror while tightening the LED strip, cut the end of your LED strip and place an L-shaped LED strip connector to the end of the strip by squeezing the connector shut on the LED strip.
You may have to fold the strip until you can cut it if the side of your mirror is shorter than the cut line, which is between the copper dots on the strip.

Step 4. Connect the next side to the other end of the connector and repeat the step for each side of your mirror.
Each L-shaped connector should be located in a corner of your mirror.
It’s important to check to see if each LED light strip works by plugging in your adapter cord to the LED lights after connecting it to each connector.
If they don’t light up, you may have to replace or readjust the connectors.

Step 5. Once you have each strip laid out as you want them and know they are working, then you can peel off the backing on the LED strips and stick them in place.

Step 6. Glue each L-shaped strip connector in place after sticking your LED strips in place.
Do this after placing your LED strips just in case you have to readjust them.

Step 7. Plug in your LED light strips and enjoy your mirror!
Method 3: Add a Rechargeable Light Bar to Your Vanity Mirror

What You’ll Need
- Light bar
- A clean cloth

Step 1. Unbox the light bar.

Image by Silvastrings on Shutterstock
Step 2. Clean the surface of your mirror so your light bar will adhere easily.

Step 3. Stick the light bar onto the mirror using the suction cup attached to the back of your light bar.
Some may also have an adhesive backing. If this is the case, take off the backing and firmly place the light bar onto the surface of the mirror.

Step 4. Enjoy your mirror with light bars!

Note: Many light bar products may not hold a charge for very long. The brightness of the light may also fade quickly with the charge. Recharging your light bar daily is recommended for better lighting.
Additionally, in case if you are still wondering and have questions like (we often see people get confused on this) how to add light or light a bathroom mirror, the answer is you can use these methods on any mirror be it a bathroom mirror or any designated makeup mirror.
Other Methods to DIY a Vanity Mirror with Lights

Photo by deagreez on Adobe Stock
There are many DIY vanity mirror options available on the web today. Choosing which is right for you depends on the tools available and your personal skill level.
While some options are relatively easy, others will be a little more labor-intensive and require more tools and supplies.
With a little hard work, you can have a true piece of art that you created.
However, if done incorrectly, your mirror can look shabby or be unstable, so it’s important to follow directions carefully and seek assistance if needed.
Here are some helpful videos to get some creative ideas for your DIY vanity mirror with lights:
How to Install LED Light Strips on the Back of Your Mirror
(We aren’t going to start this guide talking about how you should first buy a mirror and purchase the LED strips, etc. We will give you some tips on that later on but for now, our steps are going to focus on the DIY installation under the assumption that you already have the type of mirror and lights that you need.)
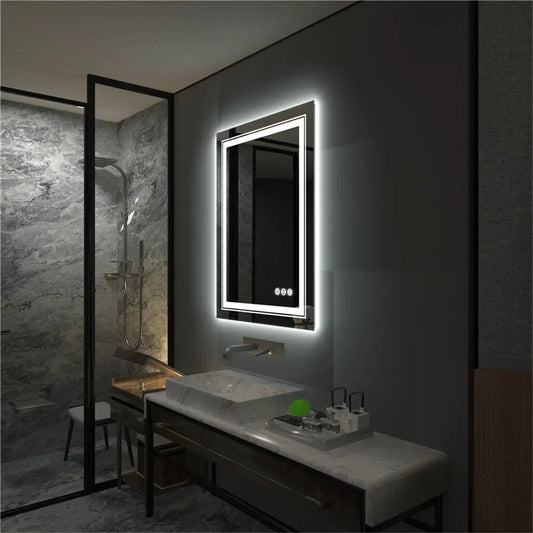
Here is how a backlit mirror looks like if you are wondering.

1. First step, prepare the mirror and the LED strips
Before you get into the installation part, it is important to prep both the mirror and the strips.
To prep the mirror, follow these steps:
- Take the mirror off the wall or the vanity stand on which it is placed (that is, of course, if you are working with an existing mirror and not a new one).
- Clean the back of the mirror properly to make sure there is no dirt or grease on it that can affect the adhesive of the LED strips.
- Measure the mirror using a tape measure to get an accurate idea of how long the LED strips need to be.
To prep the LED strips, follow these steps:
That ends the prepping process.
2. Second step, install the LED lights on the back of the mirror
After the prepping, you need to install the LED lights on the mirror.
Follow these steps for the installation:
- Peel off the tape from the back of the LED strips and put them on the back of the mirror one by one.
- Make sure to keep some distance between the lights and the edge of the mirror. (If you place the LED right at the edge, the individual units can be spotted from the front, which doesn’t give a good look.)
- Make sure that all the lights are evenly placed on all of the borders so that there is a symmetrical glow from all sides.
- After all the LED strips have been attached evenly on the back of the mirror, connect their wire(s) to the adapter/power supply unit.
3. Third step, install the mirror and connect the lights to the power outlet
Next, you have to install the mirror back on the wall or the vanity stand. When installing the mirror, make sure to give it some space from the back so that the LEDs can shine enough light to create a glow. Also, spacing the mirror from the back helps make sure that there is no overheating in the light units.
When installing the mirror, use the right screws and brackets to make sure that it stays stable and fixed in place.
After that, connect the LED light strip’s adapter to a power outlet. Ideally, there should be an outlet very close to the mirror so that there are no hanging wires to ruin the aesthetics. If you are creating a completely new setup and you have yet to select a place for the mirror, pick one with a socket close by.
4. Fourth step, add the final touches to your mirror + light setup
Once the mirror has been installed and the lights have been connected, test out the setup by turning the LEDs on and off a few times. If the lights create the desired effect and you’re satisfied with how everything looks, go ahead and add the final touches. Here is what you should do:
- Clean the mirror thoroughly
- Hide any wires that may be showing up after the installation
- Make sure that the LEDs are not showing up where they are not supposed to; walk around the room and view it from different angles
- Make sure that the power supply/adapter is securely placed and is not in danger of falling over, unplugging the LEDs as it goes
And that’s it. That is the DIY process of installing LED lights on your mirror.
Tips for Buying the Best LED Lights for Your Mirror
While the DIY guide ends above, we want to give you some tips on buying LED lights. There are many different types of lights that you can buy, and not being aware of the different features/qualities can lead you to make an unsatisfactory purchase.
With that said, here are some of the main things that you should look for when buying LED lights for your vanity mirror:
- Color temperature of the lights: There are three different temperatures that you can pick from, depending on your preference. The temperatures include warm (soft yellow hue), cool (sharp blueish hue) and natural (imitation of natural light). You could also buy smart LEDs that can provide all three colors all-in-one, but they are usually quite expensive.
- Wattage (power consumption): Check and see how energy-efficient the LED lights are. They usually don’t consume a lot of power, but checking the wattage can help you get an accurate idea.
- Color variety: You can choose to buy LED strips with just one color (white) or multiple. Strips with multiple colors can usually be controlled with a remote. You can adjust the color of the light with a simple press of a button and change the aesthetic of your room whenever you want.
- Brightness control: Some LED strips come with a fixed light intensity while others provide brightness control. You can dim the lights when you need. This is also a feature that you should look for when buying a light strip.
Backlighting a mirror is a unique and eye-catching way to add depth, dimension, and drama to any space.
Unlike traditional vanity mirror lights, which are typically mounted above or around the mirror to provide task lighting, backlighting involves placing a light source behind the mirror itself.
This creates a soft, ambient glow that not only illuminates the mirror but also casts a warm, inviting light into the surrounding area.
Backlit mirrors are becoming increasingly popular in modern interior design, adding a touch of luxury and sophistication to homes, hotels, and commercial spaces alike.
The effect is particularly striking when the mirror is mounted on a wall, creating the illusion of a glowing, floating piece of art.
Vanity Mirror FAQs
Here are answers to frequently asked questions about vanity lights and mirrors:
How long do LED light strips last?
These light strips can last 20,000 to 50,000 hours. The LED lifespan outshines the lifespan of the incandescent bulb by thousands of hours.
Can I replace a bulb on an LED light kit or strip?
Unlike standard bulbs that can easily be unfastened, integrated LED bulbs are built into multiple electrical circuit boards and they can’t be easily replaced. The entire integrated fixture must be replaced.
How do you hang lights on a mirror?
To hang lights on a mirror, you can use an LED light kit or light strips with adhesive backing. Clean the mirror surface, measure and mark the desired placement, then carefully peel and stick the lights around the mirror frame or edges. Secure any loose wires with electrical tape or cable clips.
Can you put a light over a mirror?
Yes, you can install lights above a mirror to provide overhead lighting. Wall-mounted sconces or vanity light bars are popular options for placing lights over a mirror. Position the lights about 18-24 inches above the mirror for optimal illumination.
How do you backlight a mirror?
To backlight a mirror, you can use LED light strips or a backlit frame. For light strips, measure and cut the strips to fit the mirror's dimensions, then adhere them to the back of the mirror. Backlit frames are designed with built-in LED lights that cast a glow around the mirror's edges, creating a dramatic effect.
Can you mount a light on a mirror?
Yes, you can mount lights directly onto a mirror's surface. Adhesive-backed LED light strips or light bars are suitable options. Clean the mirror thoroughly, peel off the adhesive backing, and firmly press the lights onto the desired location. Ensure the mirror's surface is flat and smooth for proper adhesion.
Can I replace a bulb on an LED light kit or strip?
Unlike traditional bulbs, individual LEDs on light kits or strips cannot be easily replaced. The LEDs are integrated into the circuit boards, and if one fails, the entire unit needs to be replaced. However, LED lights have a significantly longer lifespan compared to incandescent bulbs, reducing the need for frequent replacements.
How much does a frameless glass mirror cost?
A frameless mirror can cost anywhere from $10 to $100 depending on the size and quality you need. You can expect to pay more for a framed mirror, which can range from about $50 to $250 or more.
Why Buy a Professional Mirror?

While professional-grade vanity mirrors can cost more than a regular mirror that you add lights to yourself, the quality and lighting will be far superior.
When deciding what you’re looking for in a lighted mirror, it’s important to know your space, your needs, and the look you want.
Professional mirrors offer different levels of magnification, lighting, styles, and sizes.
Lighting, as we’ve discussed, is vital to proper makeup application. Consider where your mirror will be located. Is there a window or is the room completely devoid of natural light?
Many professional mirrors offer different color temperature settings that range from cool to neutral to warm, as well as adjustable brightness, so you can test what you look like in various lighting.
Professional quality mirrors have an assortment of high-end features like built-in Bluetooth speakers and touchscreens that make it easy to change or pause your music while putting on your makeup.

A DIY vanity mirror with lights can be a lot of work to create. If it doesn’t turn out right it can look cheap, fall apart, and give you bad quality finishes and lighting.
With a professional-quality mirror, you can know what you’re getting by checking through reviews and seeing pictures of the product before making a decision to buy. Opting for a professional mirror will also save you time, planning, and energy.
Whether you decide to go the DIY route or buy a mirror, always have a clear idea of what you want.
Professional Vanity Mirrors

When deciding on a mirror to purchase it’s important to know what size you want your vanity mirror to be, your budget, the dimensions of your vanity table, and the look you want from your vanity mirror.
If you want an overstated piece, you might want to go with a larger mirror. If you want to focus on magnification and don’t want a mirror that takes up an entire wall, you might want to go with a table top mirror.
Below are a few quality professional mirrors to consider:
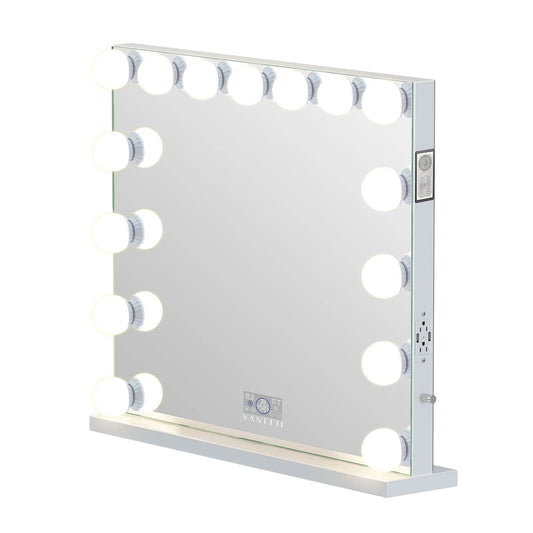
1. PRO Hollywood Mirror with Bluetooth Speakers

This mirror offers a durable and sturdy structure with an aluminum frame and iron back.
It has balanced illumination with wrap-around lighting and a sleek all-glass surface.
This mirror provides touchscreen lighting options, music controls, and dual Bluetooth speakers, making it perfect for jamming out while doing your makeup.
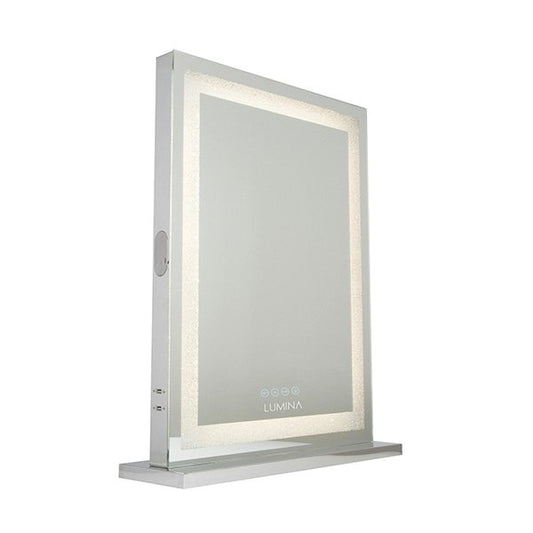
2. Crystal Vanity Mirror with Bluetooth Speakers

This mirror offers luxury with an elegant, illuminated crystal border and touchscreen controls that offer three color temperature settings with different brightness levels.
You can select cool, neutral, or warm lighting depending on the occasion with a range of 3,000 Kelvins to a near natural sunlight level of 6,400 Kelvins.
3. Hollywood Table Top Makeup Mirror

While tabletop mirrors can be a cheaper option, a professional tabletop mirror doesn’t necessarily mean you get less.
This mirror has touchscreen light controls, a glamourous Hollywood look, extra magnification options, a 360-degree swivel mirror, and a sturdy iron frame.