
Your vanity is a great place to connect with and express yourself. It provides an area for you to start your day and a place to unwind and practice self-care after a long day.
But if your vanity is unorganized, using it can be less of an enjoyable experience and more of a hassle.
Here are some ways to tidy up so you can utilize and appreciate your vanity to the fullest.
Out With the Old

The first step in the process of tidying up is to remove all of your makeup and beauty products from the vanity. This will help you start with a clean slate and allow you to take stock of all the products you have.
Go through all your products and eliminate anything that you never use.
Next, you should check the expiration dates of all your products and make sure they aren’t expired or going bad. If something’s color or texture seems off, that’s a good indication that it has expired. Assuring all your eye products are fresh is especially important as our eyes can be more prone to infection.
If you don’t remember when you used a product or where you got it, it might be a good time to let it go. Old makeup is known to harbor bacteria and it can be a safe bet to just get rid of something if you aren’t sure how old it is.
Give Every Surface a Wipedown

Now that you’ve removed everything from your vanity and thrown out the old or expired products, you can give it a good wipedown.
Choosing the right product to clean your vanity depends on what your vanity is made of:
Wood Vanity
If your vanity is wood and has makeup stains, mix some dish soap or dishwasher detergent in hot water and dip a clean cloth in the soapy foam created by the mixture.
Apply the bubbly soap to the stain and wipe, rinse with water, and dry. Using a wood polish or wax after will have your vanity looking good.
Oil-based solutions can also be used and are generally safe on stained wood. If your vanity has makeup stains from spills or use, an oil-based makeup remover, olive oil, or lemon oil can work well to lift the stains.
Painted Vanity
If your vanity is painted, you’ll want to be careful when removing stains so that you don’t also remove paint. Using warm water and dish soap, an oil-based makeup remover, lemon oil, or olive oil can be successful at removing most makeup stains on the surface.
Natural Stone Vanity
When removing makeup stains from a vanity made from natural stone, you’ll need to use acetone, which is the main ingredient in nail polish remover.
Make sure you open a window as the fumes from the acetone can be pretty strong.
First use a clean, dry cloth to apply a little acetone to the stained surface. If the stain doesn’t come off, you may need to mix a paste of acetone and baking soda for tougher stains that have been allowed to sit.
Leave the paste on for 24 hours and then remove and rinse with water. You’ll want to reseal your marble or other natural stone after this process.
For marble surfaces, you can also try using soapy water mixed with flour. Use this flour and soapy water paste to cover the stain. Then wrap the counter with plastic wrap and cover the stain for 24 hours.
After it has set, wipe the paste off with a sponge and dry with a clean cloth. Although this process is less smelly and harsh than the acetone method, it may not work as well for lipstick or other makeup stains.
Glass Vanity
If you’ve spilled lipstick, lip gloss, or an oil-based substance on your glass vanity, you may need to use warm water and dish soap to remove it.
A cleaner with ammonia works well after to give the glass a clean, fresh look. Spray a little on the surface and wipe clean.
Use Drawer Liners

If you haven’t already, I recommend using cabinet liners inside your drawers to help protect your vanity from any spills or stains and to help give containers something to grip.
Spilling makeup inside your drawers can make it look dirty and gross. It's hard to clean in the cracks and get all the stains out. To prevent this, use a liner that protects the surfaces of your drawers or cabinets from your makeup.
Liners come in a variety of fun colors and prints. They are durable and easy to clean.
For a makeup drawer, it's best to find a liner that is non-adhesive but will grip the drawer so it doesn’t shift over time. Make sure the liner is a good rubbery material that will grip the bottom of the drawer and keep it from moving around.
You want to avoid using an adhesive liner in this circumstance because that can destroy the finish inside a drawer when you try to remove it. And then you may have to waste time scraping adhesive off the inside of the drawer.
You’ll need to measure your drawers and cut the liners to fit. Make sure the liner fits well along the edges of your drawers to avoid getting makeup in the corners.
Take Time to Categorize

Go through your products again and categorize them by types, such as:
- Lips
- Eyes
- Base products
- Skin care creams
- Fragrances and perfumes
To keep clutter from popping back up, designate spots for each category. This is one of the most important aspects of keeping your products organized and easy to find.
I keep my face primer and moisturizer with my face makeup since I use those products just before putting on my concealer or foundation.
Once you have separated your products into types, you may then want to separate them into what you use most.
You can keep the products you use most frequently in an area of the vanity that’s easy to access. This can be out on the counter in a stylish tray or makeup organizer, or in an upper drawer with smaller trays or drawer dividers that separate each category within the drawer.
Place the makeup that you use only for special occasions in a separate drawer that isn’t as accessible but still keeps it safe and easy to find. You may still want to organize this makeup into categories, otherwise, this drawer or area of your vanity could fall into disarray.
Use Containers

Containers are your friend. They keep your cosmetics together and are easy to sort through while also looking stylish.
Here are some of my favorite types of containers:
Multi-level Clear or Opaque Drawers
A makeup organizer with multiple levels or drawers can be an easy and ideal way to store your makeup. Having a designated drawer for lipstick, eyeshadows, foundation, and brushes can help keep your products fresh, clean, and easy to find.
Rotating Organizer
Rotating makeup organizers come in a variety of fun styles and shapes. They can be a fun way to keep your makeup, especially if you are wanting to keep certain things on your vanity counter for easy access.
Makeup Palette Dividers
These come in a variety of different colors and materials. Some dividers are made of metal while others plastic. They are helpful when you want to keep your eyeshadows, contouring palettes, powders, bronzers, and blushes in an easy-to-find, organized location.
Makeup palette dividers can be used for anything that is awkward or hard to fit into a drawer.
Trays
A table tray can be an exciting addition to your organization solution. The overall aesthetic of your vanity may play a role as to which tray you decide to go with.
Trays can be used to express your style and keep things tidy. You can place a few of your favorite products in an arrangement on the tray.
There are many different styles you can choose from. It really depends on the look you’re going for. Some trays have mirror bottoms, while others are made of wood or metal.
When choosing the material, you may want to keep in mind how easy it will be to clean.
Ice Cube Trays for Small Items
Ice cube trays are useful for smaller items or round containers like individual eyeshadows, concealers, and lip balms. You can organize each ice cube tray inside your drawers by category. They’re easy to clean, inexpensive, and keep things tidy inside your drawer.
Brush Organizers
If you want to protect your brushes from dust particulates or aerosols while protecting their shape, a brush organizer with a lid is a great option.
Another option is storing your makeup brushes in jars. This not only will look good and help you keep organized, but it can also extend the life of your brushes by helping them keep their shape.
Lined Baskets
Lined baskets can offer a cozy, homey look to your vanity while storing your products in an organized fashion. Because most baskets are difficult to clean, having a removable liner that you can take off and wash every once in a while makes it easier to keep clean and organized.
Nail Polish Organizer
Like the ice cube tray, a nail polish organizer can be used to store smaller or liquid items like mascara or your collection of lipsticks.
If you have a large collection of lipsticks, it can be fun to use a nail polish organizer and arrange them by color so it’s easy to find the shade you want.
Upcycling Solutions
While many of the solutions already mentioned could already fall under the upcycling category, I would like to go over a few more fun options.
Using a vintage suitcase or trunk can be a fun and unique way to display and store your makeup.
You can use a small case on your vanity counter or use the actual suitcase as a vanity by attaching legs to the corners to raise it off the ground. Using a removable liner inside the suitcase can be helpful for washing and keeping it clean.
Upcycling an old desk and using it as a vanity can be a fun and money-saving method. You can complete the look by adding a vanity mirror and comfortable chair.
If your vanity is small or lacks drawers, a fun way to display makeup is by using a bar cart next to your vanity. It has a cool vintage appeal and you can add little flourishes to show off your style.
Personalize Your Space

Now that your vanity is clean and your cosmetics are in order, you can really get creative and personalize your vanity!
This is completely up to you and your style. But something like scented candles, potted plants, paintings, sculptures, or paraphernalia from your favorite books, movies, or TV shows are a great way to add a finishing touch.
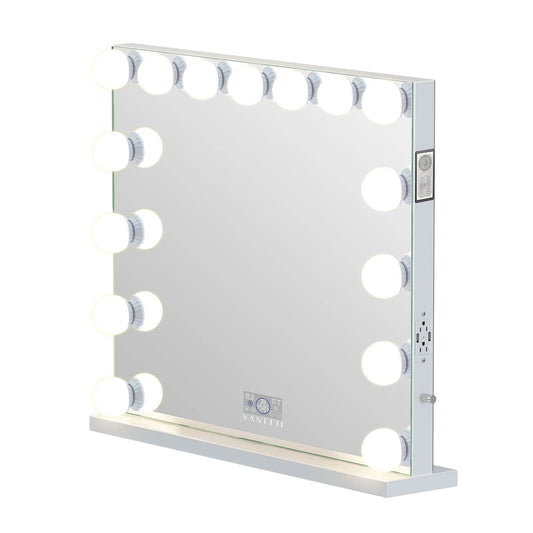
You can choose the best lighting, chair, mirror, storage, and accessories that fit your style and space. You can add a rug or cozy place to rest your feet or a cool Hollywood-inspired mirror. This should be fun and make your vanity more appealing and inviting.
Storing your makeup in fun and creative ways can be even more enjoyable when your vanity is not in the bathroom. This will allow you more freedom and give you fewer concerns over particulates or aerosols contaminating your makeup and brushes.
The vanity is your oyster, your special place to pamper yourself and feel your best, so make it comfortable, personalized, and fun.
Keeping Your Vanity Organized Over Time

I know it can be hard to find that balance between organization and keeping what you want, but once you do you’ll find that it makes that area of your life a little bit easier.
If your vanity starts to get too crowded, it’s a good indicator that you need to downsize or reevaluate your storage or cosmetics.
Sticking with a clean and organized vanity is an ongoing process. Having a proper place for everything will always make maintaining an organized environment a little less complicated.
Organization is key in protecting your products, keeping your skin healthy, and maintaining a fun and stylish vanity you can enjoy.